Tuesday, July 15, 2014

Easy Grilled Chicken

One of my favorite ways to eat chicken is grilled. I love the moist texture that it keeps inside, with the flavorful crisp outside layer. With a super taste and ingredients I always have on hand, this is my go-to grilled chicken recipe. It is super tasty, and very versatile. You can use it to top your favorite salad, make delicious wraps, or fill a taco shell. I hope you enjoy it as much as we do!


Easy Grilled Chicken


Ingredients:

4 chicken breasts
garlic powder
onion powder
salt & pepper to taste
2 TBSP Coconut Oil

Directions:

 Heat coconut oil over med heat. Add chicken breasts to oil and salt and pepper each. Sprinkle garlic and onion powder over each. Cook until brown, then flip and do the same thing on the other side. Turn heat down to med-low and continue cooking until cooked all the way through. You can cut the breasts into a few pieces to finish cooking faster. Place on a cutting board and cut into thin slices.


Enjoy!
 
Pin It!

Friday, July 11, 2014

Chocolate Sourdough Cake

One of my favorite real food desserts is this delicious chocolate sourdough cake. Its deep, rich chocolate taste satisfies that sweet tooth, while its fermented whole wheat and cocoa breaks down most of the gluten, and those pesky anti-nutrients and frees them up to gather and eliminate free radicals from your body. Plus it develops a culture of healthy bacteria to help digest your food. Yes folks, this cake will help you digest the rest of your meal! 

This cake is also made with rapadura, instead of processed white sugar. Rapadura is the whole form of the sugar cane that has been crushed and evaporated, leaving all of its natural nutrients intact, instead of taking all of them out and processing it down to more of a chemical substance that wreaks havoc on your system. If you've never tasted it, you are in for a treat! Do yourself a favor and get some from your local health food store. You'll love its rich nutrient-full taste!


Chocolate Sourdough Cake


Sponge Ingredients
(The night or morning before)

1 C starter, active & bubbly
1 C milk
1 ¾ C whole wheat flour
1 ¼ C coconut oil melted and cooled
1 tsp sea salt
½ C cacao powder
3-4 oz. chocolate (3TB cocoa + 1 TB butter = 1 oz.)
(can combine last 2 ingredients)

Final Batter Ingredients

1 C rapadura sugar
2 tsp vanilla
2 large eggs
1 egg yolk
1 ½ tsp baking soda
½ C chocolate chips (or cacao nibs)

Directions:

Combine sponge ingredients in a large bowl, cover, and let sit on counter 6-12 hours.

 Before Rising


 After Rising

After the rising time, mix together the final batter ingredients. 


Add spoonfuls of the chocolate dough into the final batter and  mix well with a whisk or an electric mixer until smooth. 


Add in chocolate chips.


Preheat oven to 350 degrees. Pour batter into a greased 9x13 baking dish.


Bake at 350 degrees for 35 minutes, or until toothpick inserted into center comes out clean.


Top with your favorite frosting. I prefer a less sweet frosting so the sweetness of the cake can stand out, such as the one below:

Chocolate Chip Sour Cream Frosting:

1 cup semisweet chocolate chips
3/4 cup sour cream
1/2 tsp. vanilla


In a double boiler, or in a saucepan set over a pan of hot (not boiling) water, melt the chocolate chips, stirring until smooth. 
Add the sour cream and the vanilla and beat, with an electric mixer on medium speed, until smooth and creamy. Let cool just slightly - until the frosting begins to thicken. But don’t wait too long because it will quickly thicken beyond spreadability. Spread frosting evenly over cake, then chill until set.


If you have any left after the first day or two, put the cake in the fridge for a delicious chocolate-frosted chocolate doughnut texture. 

Enjoy!!


Printable Recipe:

Chocolate Sourdough Cake

Sponge Ingredients
(The night or morning before)

1 C starter, active & bubbly
1 C milk
1 ¾ C whole wheat flour
1 ¼ C coconut oil melted and cooled
1 tsp sea salt
½ C cacao powder
3-4 oz. chocolate (3TB cocoa + 1 TB butter = 1 oz.)
(can combine last 2 ingredients)

Final Batter Ingredients

1 C rapadura sugar
2 tsp vanilla
2 large eggs
1 egg yolk
1 ½ tsp baking soda
½ C chocolate chips (or cacao nibs)

Directions:
Combine sponge ingredients in a large bowl, cover, and let sit on counter 6-12 hours. Mix the final batter ingredients together. Add the chocolate dough to the final batter ingredients and mix well with an electric mixer or whisk. Preheat oven to 350 degrees. Pour batter into a greased 9x13 baking dish and bake at 350 degrees for 35 minutes, or until toothpick inserted into center comes out clean.

Chocolate Chip Sour Cream Frosting:

1 cup semisweet chocolate chips
3/4 cup sour cream
1/2 tsp. vanilla


In a double boiler, or in a saucepan set over a pan of hot (not boiling) water, melt the chocolate chips, stirring until smooth. 
Add the sour cream and the vanilla and beat, with an electric mixer on medium speed, until smooth and creamy. Let cool just slightly - until the frosting begins to thicken. But don’t wait too long because it will quickly thicken beyond spreadability. Spread frosting evenly over cake, then chill until set.
Pin It!

Saturday, May 31, 2014

Lacto-Fermented Oatmeal

     Oats, just like any other grain, need to be fermented to break down the anti-nutrients, or phytates, that they contain. Oats also have gluten which,  like wheat, needs to be fermented to partially break it down before it enters your system. Without fermenting, oatmeal is a marginally nutritious breakfast that drains your energy and leaves you hungry an hour or two later. But with fermenting, oatmeal becomes a powerhouse meal that will digest well, keep you satisfied and full way beyond lunch time, and give you lasting energy throughout the day! Not to mention, the taste of fermented oats is far superior! All you need is a little bit of whey, the liquid in yogurt. Once you have this ingredient, you can ferment almost anything! Or you can also use plain yogurt as well, if you don't have any whey.


 Lacto-Fermented Oatmeal (breakfast porridge)

From Nourishing traditions

Ingredients:

2 cups oats, rolled or cracked
2 cups warm filtered water plus 4 TBSP whey, yogurt, kefir, or buttermilk
1 tsp sea salt
2 cups filtered water

Directions:

 Mix oats with warm water mixture, cover and leave in a warm place overnight (7 to 24 hours). Bring
an additional 2 cups of water to a boil with sea salt. Add soaked oats , reduce heat, cover, and simmer several minutes. Remove from heat, and let stand for a few minutes. Serve with plenty of butter or
cream and a natural sweetener like rapadura, date sugar, maple syrup, maple sugar or raw honey.


Pin It!

Thursday, May 29, 2014

Chocolate Coconut Milk Icecream


This homemade icecream is really simple, no icecream maker needed. Just mix together a few ingredients, let it freeze for a few hours, and voila! Homemade, decadent, dairy-free icecream.


Chocolate Coconut Milk Ice Cream 

(Inspired by Julia MacDonald)


 Makes 4 servings


Ingredients:

1 14 oz. can full-fat coconut milk
1/4 cup + 2 Tablespoons cacao powder (or cocoa powder)
1/4 cup honey (or maple syrup, for vegans)
1 teaspoon vanilla extract

Directions:

Combine all of the ingredients in a blender, and blend until smooth and creamy. (Originally, I tried whisking them together in a bowl, but the blender was much more effective!)

Adjust the flavor to your taste, then transfer to a freezer-safe container. Place in the freezer for 4-6 hours, or until firm.
Pin It!

Cacao No-Bake Cookies

     These cookies are a delicious and healthy way to satisfy that sweet tooth that demands attention on occasion! Sweetened with pure maple syrup, one of the better choices as far as sweeteners go, these cookies also have the added health benefits from cacao, which has been shown to fight free radicals (cancer-causing cells) among other things. A Cancer-fighting cookie? Can't beat that!


Cacao No-Bake Cookies

Ingredients:

⅔ C maple syrup
¼ C Coconut oil
5 TB Cacao powder (Cocoa works too)
1 tsp Cinnamon
½ C unsweetened Almond Butter or peanut butter
1 C rolled oats
1 tsp Vanilla
¼ C Unsweetened Coconut (optional)


Directions:

Combine maple syrup, oil, cacao, and cinnamon, and heat over medium heat. Boil for 3 minutes, stirring constantly. Remove from heat and stir in almond butter, oats, vanilla, and coconut until well blended. Drop by spoonfuls on wax paper. Chill for 30 minutes.


Pin It!

Sauerkraut

Sauerkraut....the word might bring up feelings of nostalgia, excitement, or even fear for you. But for me, it brings PASSION.  Sauerkraut is one of the first foods I learned to ferment, and it is still one of my favorite fermented foods, and one of the most healthy foods I have ever made. There are numerous health benefits of sauerkraut, which you can easily read about with a quick internet search. The main benefit being the digestion-promoting lactobacilli that it contains. This is the "good bacteria" that your body needs to digest food properly. Also, more than 70% of our immune system is contained in our digestive tract, another reason to keep your digestion moving and flowing with ease. Which is what this simple dish does. Added to each meal, this food will give you a boost in energy, help digest your meal, and add a richness of flavor you will learn to love.

So, what is sauerkraut? Nothing but cabbage and salt, left on your counter for a few days. Easy, right? Right. Really. If you're new to fermenting, this is the ideal place to start.


Traditional Sauerkraut


Adapted from Nourishing Traditions

Makes 1 quart

Ingredients:

1 medium cabbage, cored and shredded
1 Tbsp sea salt
1 Tbsp caraway seeds (optional)
4 Tbsp whey (or another 1 TBSP salt)

Directions:

In a bowl, mix cabbage with caraway seeds, sea salt and whey. Pound with a wooden pounder or a meat hammer for 5 minutes to release juices. Let sit for 5 minutes, then pound 5 more minutes. (Or let it sit for 15 minutes without any pounding.) Place in a quart-sized, wide-mouth mason jar and press down firmly with a pounder until juices come to the top of the cabbage. The top of the cabbage should be at least 1 inch below the top of the jar. Cover and keep at room temperature for about 3 days then transfer to cold storage. The sauerkraut may be eaten immediately, but it improves with age.
Pin It!

Wednesday, May 29, 2013

Lemongrass Chicken


We got this delicious recipe from our friend who's parents own a Thai restaurant. He was in the kitchen of the restaurant experimenting one day and came up with this delicious concoction. It is now one of our weekly favorites! It is super simple and amazingly flavorful. You start out with a basic Pad Thai sauce - buy a jar or make your own - it's so easy! The recipe is included below.  All it takes is one trip to the Oriental market for Tamarind paste and fish sauce if you don't have any on hand. And don't worry, they will keep for a long time in your fridge, so don't be afraid to make this one-time purchase. Add some fresh ginger, lemongrass, coconut milk, nuts, and voila! A super easy, delicious, Thai dinner at home. :)


Lemongrass Chicken
Serves 4

1 jar pad thai sauce (or homemade - recipe below)
1-2 lbs chicken breast or thighs cut in thin strips or chunks
1 stalk of lemongrass (or 3 drops lemongrass essential oil)
1 inch or so of a ginger root (or 2 drops ginger essential oil)
1/4 C coconut milk
1/2 C almonds or cashews
red pepper flakes - optional to add some heat
jasmine rice cooked

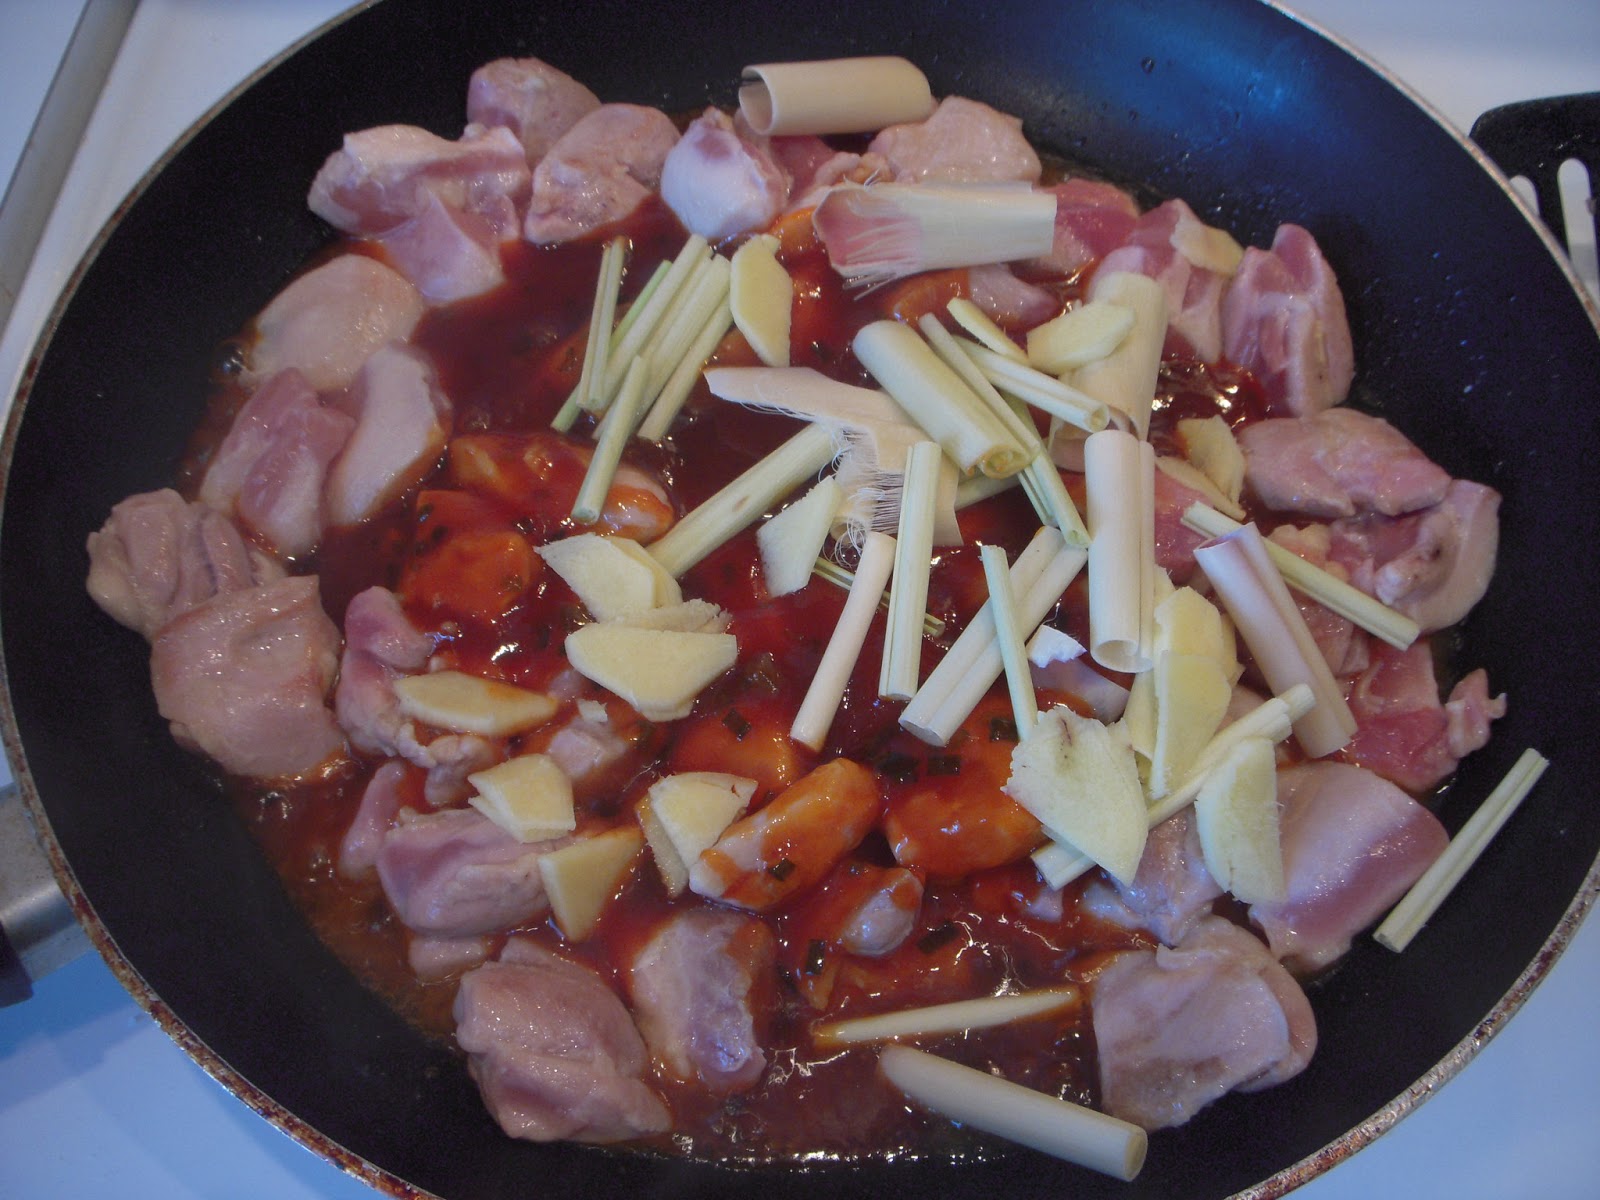
Cut the lemongrass into 1-1.5 inch pieces. Peel the ginger root and slice thinly.


 Heat some coconut oil over med heat and add chicken. Then add the pad thai sauce and coconut milk and stir. Next add lemongrass, ginger and almonds.


 Stir frequently to get the flavors blended.


 Serve over jasmine rice and Voila!


 Pad Thai Sauce

1- 1.5 TBSP tamarind paste
1/4 C chicken stock
3 TBSP fish sauce
1 TBSP soy sauce (I always use "Bragg Liquid Aminos" which is basically soy sauce but way healthier and non-GMO...soy is one of the most GMO'd ingredients.)
1/8 tsp cayenne pepper or chili sauce
3-4 TBSP brown sugar (I substituted some of it with honey)


Mix it all together in a bowl. I doubled it and saved half for the next time I make this dinner (which, like I said is every week). Or you can just use more and have more sauce. It's not as thick as the bottled sauce, so you could add some rice flour to thicken it up too if you want.


Pin It!